Let’s face it, everyone wants their computer to start up as quickly as possible. There are a number of ways to improve Windows boot time, including using an SSD, disabling startup apps, and so on, but the simplest is to enable Fast Startup. In Windows 10, a new option called “Fast Startup” was added.
It’s a feature that combines hibernation and shutdown to reduce boot times. If your PC takes a lengthy time to boot into the login screen, this feature comes in helpful. You might not notice the change if you already have an SSD installed on your computer. However, if you have a hard drive and a restricted amount of RAM, you may notice a substantial improvement in Windows boot speed.
Steps to Enable Fast Startup On Windows 11
So, if you want to enable the Fast Startup feature in Windows 11, you’ve come to the perfect place. In this article, we’ll show you how to enable Fast Startup on the latest version of Windows 11, step by step. Let’s get this party started.
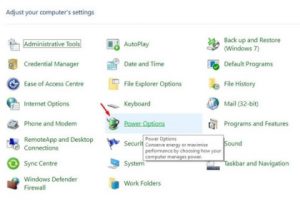
Step 1: Go to the Start menu in Windows 11 and search for Control Panel.
Then select Control Panel from the drop-down menu.
Step 2: Go to the Control Panel and select Hardware and Sound.
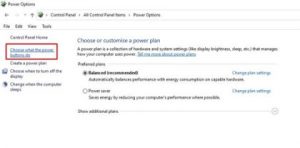
Step 3: Select Power Options from the Hardware and Sound page.
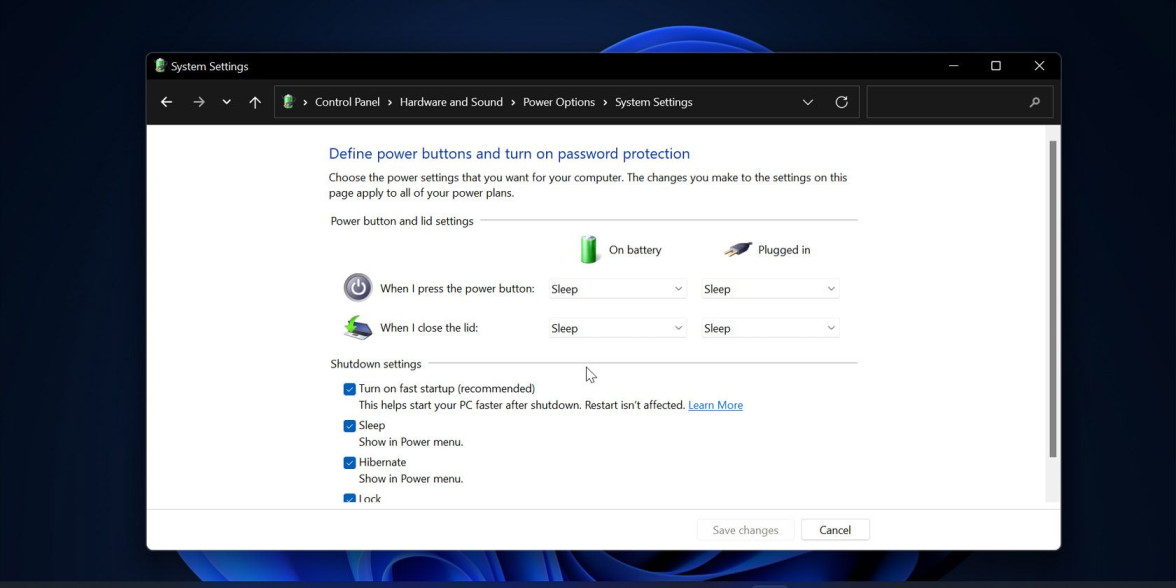
Step 4: Select the Choose what the power button does option from the left pane.
Step 5. On the following page, select the option to Change Settings that are Currently Unavailable.
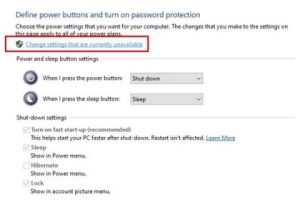
Step 6: Enable the option – Turn on Fast Startup – on the next screen (recommended).
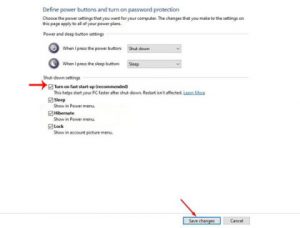
Step 7: When you’re finished, click the Save Changes button.
That concludes our discussion. You’ve completed your task. This is how you can make Windows 11 Fast Startup. Uncheck the Turn on Fast Startup option in Step 6 if you want to undo the change.
So, this post will show you how to make Windows 11 boot faster by using Fast Startup. I hope you found this material useful! Please pass it on to your friends as well. If you have any questions, please leave them in the comments section below.